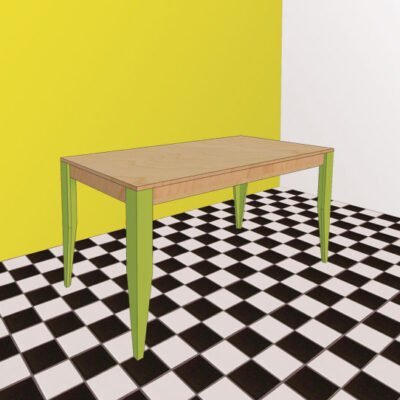
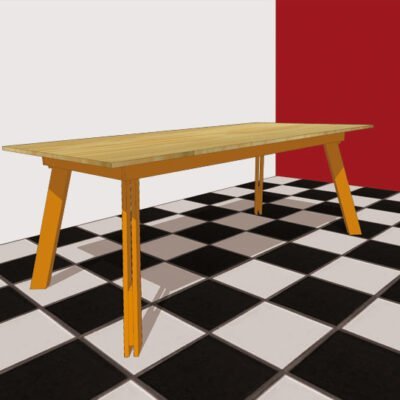
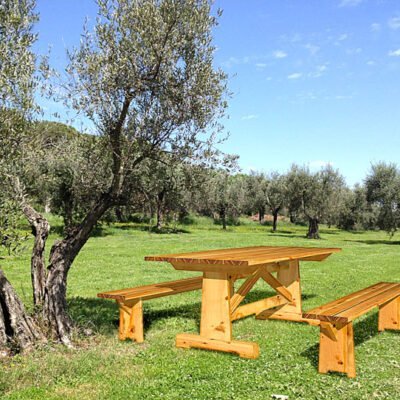
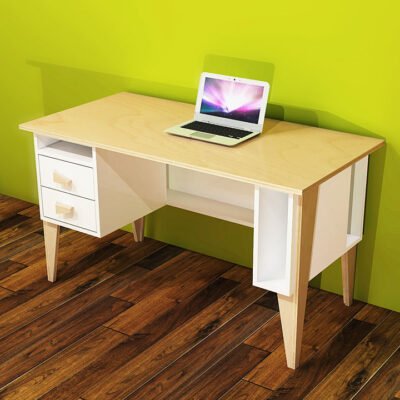
Making your own table is not very difficult and fun to do. How do you make a stable dining table, work table, conference table or garden table, and how do you make sure it’s so beautifully made that your housemates also like to have it in their home? Below we list what you should think about when you make your own plan to build your own table. You really can do it, just look at the pictures of the tables on this page: all homemade!
If you are still in doubt, buy one of our furniture drawings. Then it will certainly work.

Good reasons to make your own table:
- It’s a fun job, working with your hands and making something beautiful.
- You can make the table exactly to fit in the place you have in mind.
- It is cheaper than a table from the store. This does not apply to the cheapest tables, but these are made of cheap material that breaks down faster and becomes ugly. Not a sustainable choice!
- It’s not difficult. If you work neatly and follow our tips, you will make a table that is indistinguishable from a purchased table.
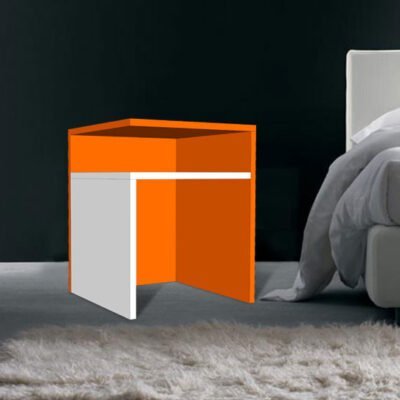
- You can choose which type of wood you use and how you finish the table, for example transparent or in a color lacquer, or treat it with a natural oil.
- It is very satisfying: how cool is it to use your homemade table every day!

What should a good table meet?
First of all, a table must be stable. You don’t want your table to wobble or creak when you eat or work on it. A solid construction is therefore important. Make use of rules: the vertical parts under the table that connect the legs and give the tabletop strength.
Use glue (in addition to screw connections) where possible for extra strength. But if you glue everything, you can no longer take the table apart for storage or transport.
The right dimensions: the most important thing is the height of the top. Often this is between 70-75 cm, but of course you can decide for yourself. Try with an existing table and with the chairs you will be using later what your favorite height is. In terms of width, you usually calculate with 60 cm per person. Make sure the legs are not in the way and also make sure there is enough legroom under the table: don’t make the rails too high.

Good design is everything
As said, it doesn’t have to be very complicated. But precisely because a table has such a simple shape, it comes down to the design. Is the shape balanced? Are the sizes in proportion? Do the connections form a logical whole with the overall picture? And does the design contribute to the sturdiness? Can you make sure that there are no screws in the picture (the hallmark of a professional piece of furniture)?
You are going to spend money on beautiful material. And time and attention to making your table as beautiful as possible. It would be a shame not to dwell on the design in detail. Don’t start until you’re completely satisfied!


Material, what are the possibilities?
The tabletop can be made of solid wood or sheet material. Suitable board material is, for example:
- Birch plywood, beautiful in pattern and structure and light in color. Very suitable for clear lacquering, oiling or soaping.
- Okoume, beautiful in color (reddish / reddish brown) and in pattern and also suitable for outdoor use. Also suitable for clear lacquering.
- Meranti plywood or a similar hardwood, slightly less beautiful but strong and affordable.
- Underlayment, actually a sheet material intended for structural use in construction. The better – and somewhat more expensive – varieties are also suitable for a tabletop: it has a beautiful, striking, light pattern.
- MDF, a pressed sheet of fine fibers with a smooth surface. It doesn’t work (doesn’t shrink / doesn’t expand), is cheap and super sleek, so ideal for (opaque) lacquering. Less suitable for structural parts.
Solid panels made of pine or spruce can be found in every hardware store. At a real timber store you can get beautiful hardwoods such as oak, beech, cherry or maple. And usually planed and sawn to size. Ready-made panels are also available. You buy this slightly oversized and have it cut exactly to size. Keep in mind that some types of wood (e.g. spruce, underlayment, and okoumé) are a bit softer. That doesn’t have to be a problem, but you are more likely to get dents or scratches in your tabletop, even after varnishing.
For the legs you can use beams or smart constructions of sheet material in combination with frameworks for the stiffness of the chassis. We often use a construction of sheet material in our designs because it allows you to realize a light-footed design with simple means.

Get started
Before you even start something, it is wise to read the applied furniture makers’ tips . The various tips will certainly come in handy if you decide to get started yourself. For those who purchase a design with manual from us: applicable tips are discussed in detail in the step-by-step plan.
Once you’re happy with your design, you’re ready for the next step: an inventory of supplies. What do you need in terms of tools and materials for joints (screws, dowels, glue, etc.) and finishing (sandpaper, lacquer, oil, soap or wax, brushes, rollers).

Cutting wood to size
If you are going to buy wood, you need a sawlist that contains all parts and numbers. Sometimes it is useful to make a sawingplan on which you indicate how the material can be conveniently sawn out of the plate or planks. This also gives you some control over the wood supplier’s quotation. There are suppliers who not only saw the wood but also deliver it.
The construction drawings of our tables always contain a sawing list and, if necessary, a sawing plan.

Preparing Material
When you have all the material complete, you can prepare the parts. Explain all parts and indicate in pencil where provisions for connections should be made (holes, recesses, etc.) Check, check, double-check and make the facilities.
When this is done you can try everything on for the first time. You will now quickly find out if everything is correct.

Preparation & finishing
Now that all parts are still loose, you can lay everything flat and you can still reach everything. This is the time to at least sand everything that comes into view. It is also nice to sand or scrape sharp edges in sight, the so-called edge breaking.
The wood is then ready to be finished: varnished, stained, oiled or soaped.

Mount
Once all parts have been prepared and ‘cleaned’ (sanding, edge breaking) then there are two ways to take the next step. You can either finish everything first with the chosen finish (lacquer, oil, wax, soap, stain etc) or you first assemble everything and then finish.
If you are going to spray, it is better to do it last – make sure that you still get to everything. But usually it is more convenient to finish all the separate parts first. Pay close attention to the surfaces that need to be glued: they are preferably not varnished. Indicate them with pencil and/or tape them off with crepe tape/painter’s tape.
If all has went well, everything fits fine now. Now you can make the final assembly. Fix everything, take enough time for the glue to dry and then.. enjoy your homemade table.

Are you still hesitating?
Then buy one of our working drawings of design tables.
– It saves you a lot of research
– You have the certainty of a solid construction
– You can easily adjust the design.
– For the price of a pot of paint you get:
- A professional design
- Beautiful design and reliable construction
- A step-by-step plan with detailed working drawings
- Tips for material selection
- A list of required materials
- A cutting list (with the dimensions of all parts)
- A sawing plan (to efficiently remove the material from the plate)
- Explanation of how to make connections (e.g. screws, dowels)
- Explanation of the finish (lacquering, staining, etc.)
- Smart furniture maker tips.