


Description
Cot Nicole, made by customers with our building plan
Click on the pictures to see more and larger pictures of this furniture, and to read the experiences of our customers.


Children’s bed building plan: making nicole yourself
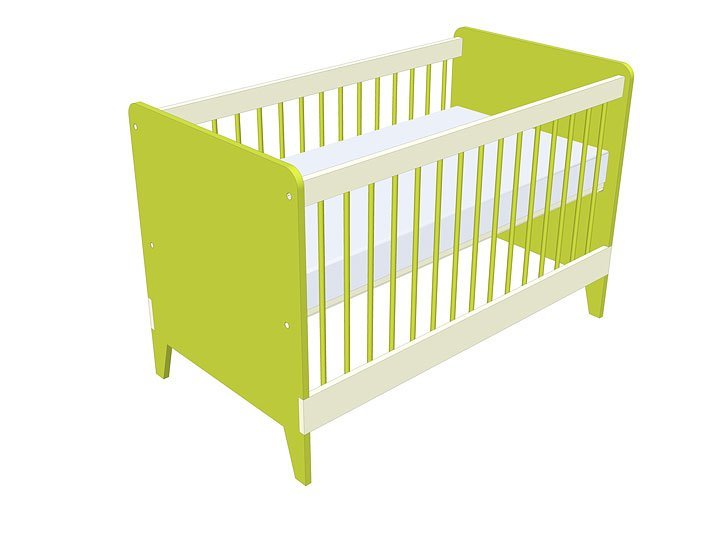
Cot Nicole: playful cot with rounded corners and rejuvenated legs. Simply make your own original cot yourself using our step-by-step plan with clear instructional drawings. The bottom of the cot is adjustable, and the furniture is easy to disassemble for storage or transport.
The design
In the design of cot Nicole we wanted to give the construction a prominent place. You can see this by the special way in which the cot is “hung” between the side walls. Furthermore, the cot has playful rounded corners and stands on slender, rejuvenated (=bevelled) legs. These style features can be found in the other two furniture from children’s room series Nicole.
The details
In addition, we took a number of specific matters into account when designing.
We pay a lot of attention to keeping screw joints out of sight as much as possible. We also describe how you can make connections with dowels in some places, so that you do not need any screws at all. If you want to paint the furniture in an opaque color, it is sufficient to neatly conceal screw connections with the help of filler. Our furniture makers’ tips describe how to do this.
Security
We have, of course, also taken safety into account. The cot is super stable and meets the safety requirements regarding the distance between the bars and the height of the side walls in relation to the bed base.
Finally, the design is tailored to the possibilities and limitations of the do-it-yourselfer and his/her tools. If you have a handsaw (sometimes jigsaw) and drill and can handle it, you can make all our furniture, so to speak. If you have professional tools, it only gets easier.
Adjustments
As you may have seen from the photos of made furniture, it is very easy to make changes to the dimensions and/or design yourself. The clear saw list and building drawings will automatically give you the confidence to do so.
The working drawing package | Building plan cot
The work drawings package consists of a nicely crafted brochure on A4 format. At the start you will find the list of necessities such as the wood (sheet material) and screws (size and number), glue and any other parts. It also shows which tools you need, and a saw list with the sizes of the parts of the furniture to be sawn.
Each building plan contains a number of applicable furniture maker tips on material selection, sawing, screwing, glue, sanding and varnishing, etc. When dowels are given as an alternative, there is also a detailed explanation so that you can get started with full confidence. Finally, a step-by-step plan follows the manual for assembling the furniture. With clear drawings and clear explanations.
Example of some pages from the working drawings package


Victor –
Het is al een paar jaar nadat ik bouwtekeningen bij jullie heb gekocht, maar beter laat dan nooit. Ik heb uiteindelijk 3 van jullie meubels gemaakt: loungehoekbank Yelmo XL, commode Nicole en dit ledikant Nicole. Nadat de commode klaar was, begon de tijd te dringen voordat de kinderkamer af moest zijn. Ik heb daarom alleen de kopse kanten gemaakt, wederom blank gelakt berken multiplex. Als zijkanten heb ik een oud kinderbedje gebruikt en dat overgeverfd, en als bodem een plaat goedkoop multiplex waarin in sleuven heb gefreesd. Dat scheelde (denk ik) veel zaag en priegelwerk, maar past nu heel mooi bij de commode.
Jullie handleidingen waren allemaal goed te volgen, en ik vind alle meubels slim ontworpen en er erg chique uitzien! In de toekomst ga ik nog een keer een hoogslaper/stapelbed maken van jullie website.
Ruud –
De bouwtekeningen gaven voldoende aanwijzingen om het bedje in 1 dag in elkaar te zetten. Met veel plezier hebben mijn jongste zoon en ik er aan gewerkt. Onderweg werd de bouwtekening steeds duidelijker. Een volgende keer zou ik geen multiplex meer gebruiken. Met het zagen splintert er af en toe iets af.
Binnenkort gaat dit tweede kleinkind vanuit zijn wiegje in dit ledikantje slapen. Dan gaat hij dromen over wie heeft dit bedje voor hem heeft gemaakt. Voor iedere beginner te maken. Alles gelukt, maar dat kan je zelf zien op de foto’s.
Rutger –
Hallo Rob. Het ledikantje is af.
Ik heb er al met al 8 uurtjes aan gewerkt.
Ik heb gebruikt gemaakt van:
– boormachine
– cirkelzaag
– decoupeerzaag
In plaats van rondhout heb ik de zijkanten vastgemaakt met een schroef (eerst voorgeboord met een verzinkboor).
Dit was mijn eerste meubel 🙂
De tekeningen waren duidelijk! Wij zijn erg tevreden met het eindresultaat.
Mieke –
We hebben de werktekening als leidraad voor een geheel ander ontwerp gebruikt.
Wel zelf ontworpen, vooral constructief. Idee elders opgedaan.
Wel hebben we dankbaar gebruik gemaakt van de constructies en tips.
Rob –
Ik heb het ledikant gemaakt volgens je werktekening. Een erg duidelijke tekening, fijn om het meubel aan de hand van die beschrijving te maken. Ik heb een aantal aanpassingen gedaan:
– het “ontwerp” iets aangepast, de vorm van het hoofdeind heb ik veranderd, heb er een sierlijst bovenop en aan de voorkant op gemaakt.
– ik heb de verbinding gewijzigd, ik wilde niet dat je aan de kopse kanten schroeven/ rondhout zou zien. Daarom heb ik de verbinding gemaakt met deuvels en verbindingsbeslag.
– De oplegging voor de lattenbodem in de bovenste stand heb ik gemaakt mbv deuvels.
– Ik heb (bijna) alles gemaakt van berkenmultiplex 18mm.
Mooi om te maken en ik ben erg blij met het resultaat.