


Description
Nesting box Arvilla and other outdoor furniture, made by customers with our construction plan
Click on the photos to see more and larger photos and to read the experiences from our customers.


Construction drawing Squirrel house Arvilla
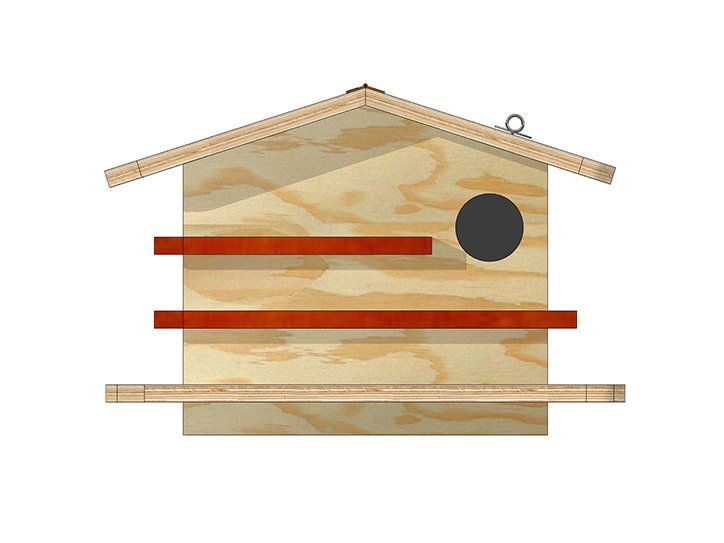
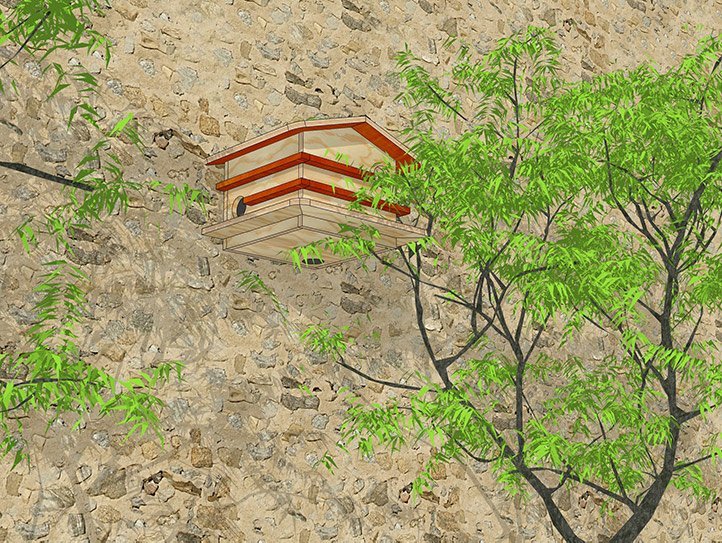
Make this nice squirrel house for the garden yourself with the help of our clear construction drawing. The design is tailored to standard sizes of plywood. This has been taken into account in the dimensions. The overhanging roof protects the box from wind and weather, for the squirrel there are three holes so that he has an escape route if necessary. You can protect the nest box extra with a natural stain or lacquer.
The design
We have of course tried to design a cabinet that is as beautiful and practical as possible. With this squirrel house we have taken a number of specific things into account. This way it fits exactly from the standard sizes of sheet material. (half a plate of 244×59 cm). Two go out of a whole record. The squirrel nest box is solidly executed, due to the smart construction it is super sturdy and easy to open to clean, for example. And of course it looks very cozy!
Also for beginners
Finally, the design is tailored to the capabilities and limitations of the do-it-yourselfer and his/her tools. If you have a handsaw (sometimes jigsaw) and drill and can handle it, you can make all our furniture, so to speak. If you have professional tools, it only gets easier.
This is a nice beginner package, e.g. to make together with the children.
… adjust your own measurements or design
As you may have seen from the photos of made furniture, it is very easy to make changes to the dimensions and/or design yourself. The clear saw list, saw plan and construction drawings automatically give you the confidence to do that. With these dimensions we have based ourselves on the sizes that are common for squirrel nest boxes.
The work drawings pack / the building drawing
The working drawings package consists of a beautifully arranged booklet (pdf) in A4 format. In the front you will find the list of necessities such as wood, screws (size and number), glue and any other parts. It also states which tools you need. And a saw list and saw plan with the dimensions of the parts of the furniture to be cut.
Tips from the professional
Each working drawing contains a number of applicable furniture maker tips about the choice of material, sawing, screwing, gluing, sanding and painting, etc. When doweling is mentioned as an alternative, an explanation is also included, enough to get started with self-confidence.
Finally, a step-by-step plan follows the manual for the assembly of the furniture, with clear drawings and clear explanations.


Lee Ann –
(1) Ik heb een houtbewerker gevonden om het eekhoornhuisje te maken. Ik vind hem GEWELDIG!!
Morgen ga ik het beitsen, zodat het klaar is om buiten te plaatsen.
(2) Ik ben vandaag klaar met het beitsen. Maandag wordt het in een boom gehangen.
(3) Ik heb het net een uur geleden opgehangen. Ik ben van plan een camera aan te schaffen om ze te kunnen bekijken.
Frans –
Ik ben er eindelijk aan toegekomen om het eekhoornhuisje te bouwen. Leuk werk! Ik heb wat natuurlijke kleuren gebruikt. Bedankt voor de tekening en nu wachten of familie eekhoorn hier in wil. Ze zijn regelmatig in mijn tuin. Ik ben benieuwd !
Harm –
Gebruik makend van de bouwtekening de villa in spiegelbeeld gemaakt.
Opgehangen in een nabij gelegen eiken boom.
Diverse reststukken hout gebruikt uitgezonderd de bodem en achterwand.
Bodem en achterwand zijn van 18 mm hardhout multiplex.
Wanden van Zweeds gezwart rabat.
De Douglas horizontale delen zijn schuin pasgezaagd.
Het dak is voorzien van dun dakleer en op de dakrand afgewerkt met Douglas.
Nu wachten op de nieuwe bewoner(s)
Harrie –
Leuk, ook als ‘startersprojectje’ voor onze workshop houtbewerking.
Willy –
Hij is al een paar dagen af, maar is nu ook opgehangen.
Gemaakt door Luca en haar vader Jip.